How to Use an Uploaded Image on Cricut
This postal service and the photos within it may contain Amazon or other chapter links. If you purchase something through the link, I may receive a pocket-size commission at no extra charge to y'all.

Cricut Design Space allows you to upload your own files! Here's how to upload JPG/PNG images to Cricut Design Space for cutting on your Cricut Explore, Cricut Maker, or Cricut Joy—and get troubleshooting assistance, too!

Looking to cutting an SVG or DXF vector file on your Cricut? Check out my How to Upload an Vector file to Cricut Design Space post!
Did you lot know you can upload your own images to the Cricut Design Space? As exhaustive equally the Cricut Library is, at that place may be files that you want to cut that don't be in their system. You tin buy files on shops like Etsy (or my shop!) or you can design them yourself using Illustrator or Photoshop!
Did I mention uploading files to Cricut Design Space is Complimentary?
Terminate pulling your hair out and start creating confidently with your Cricut! Check out our helpful Cricut Resources—everything you need to know to acquire and love your Cricut.
Cricut Design Space'due south powerful software converts images into cuttable shapes. For this mail service, nosotros're going to focus on pixel-based images. We'll talk a fleck well-nigh types of files, and then upload a uncomplicated JPG file, and then we'll talk almost some issues you might encounter when using pixel-based files.
Cricut Blueprint Space File Types
Pixel-Based Images
Basic pixel-based images are JPG, BMP, PNG, and GIF files. These files are uploaded as a single layer, and you lot tin edit them during the upload procedure. These are generally created in programs that piece of work in pixels, similar Adobe Photoshop or Microsoft Pigment.
Vector Images
Vector images are SVG and DXF file types. These file will be automatically separated into layers afterward uploading and saving. These are generally created in programs that work in vectors, like Adobe Illustrator.I always tell Cricut users to effort and find a vector image! They create much cleaner cut files than a JPG or PNG. Find out more nigh uploading vector files here.
That being said, it'southward totally possible to upload a JPG or PNG to Cricut Design Space. Let's effort it!
Download the Camping Hair Don't Intendance Epitome
Enter your outset name and e-mail accost in the box beneath for access to this freebie, along with other fun complimentary files in our electronic mail newsletter! If you have already received a freebie from my site, just enter your information again—you won't be added to any additional lists.
This freebie is for personal apply merely. You tin can learn more about our commercial license.
Uploading a JPG or PNG to the Cricut Design Infinite
Start by clicking "Upload Image" on the left-manus Design Console, and navigate to the file you want to open.


Then select it from the list of uploaded images and click "Insert Images."
Cricut Design Space will then enquire you what blazon of image y'all are cutting. For simple images like this, choose "Elementary."

In the next screen, you lot'll select whatever part of the pattern that is negative infinite—meaning it does not get cutting. Y'all want to select any white parts so they become transparent (checked). Make certain yous zoom in and select the small areas of your project. In this instance, I had to zoom in to click on the little pattern on the tent and the inside parts of the letters.

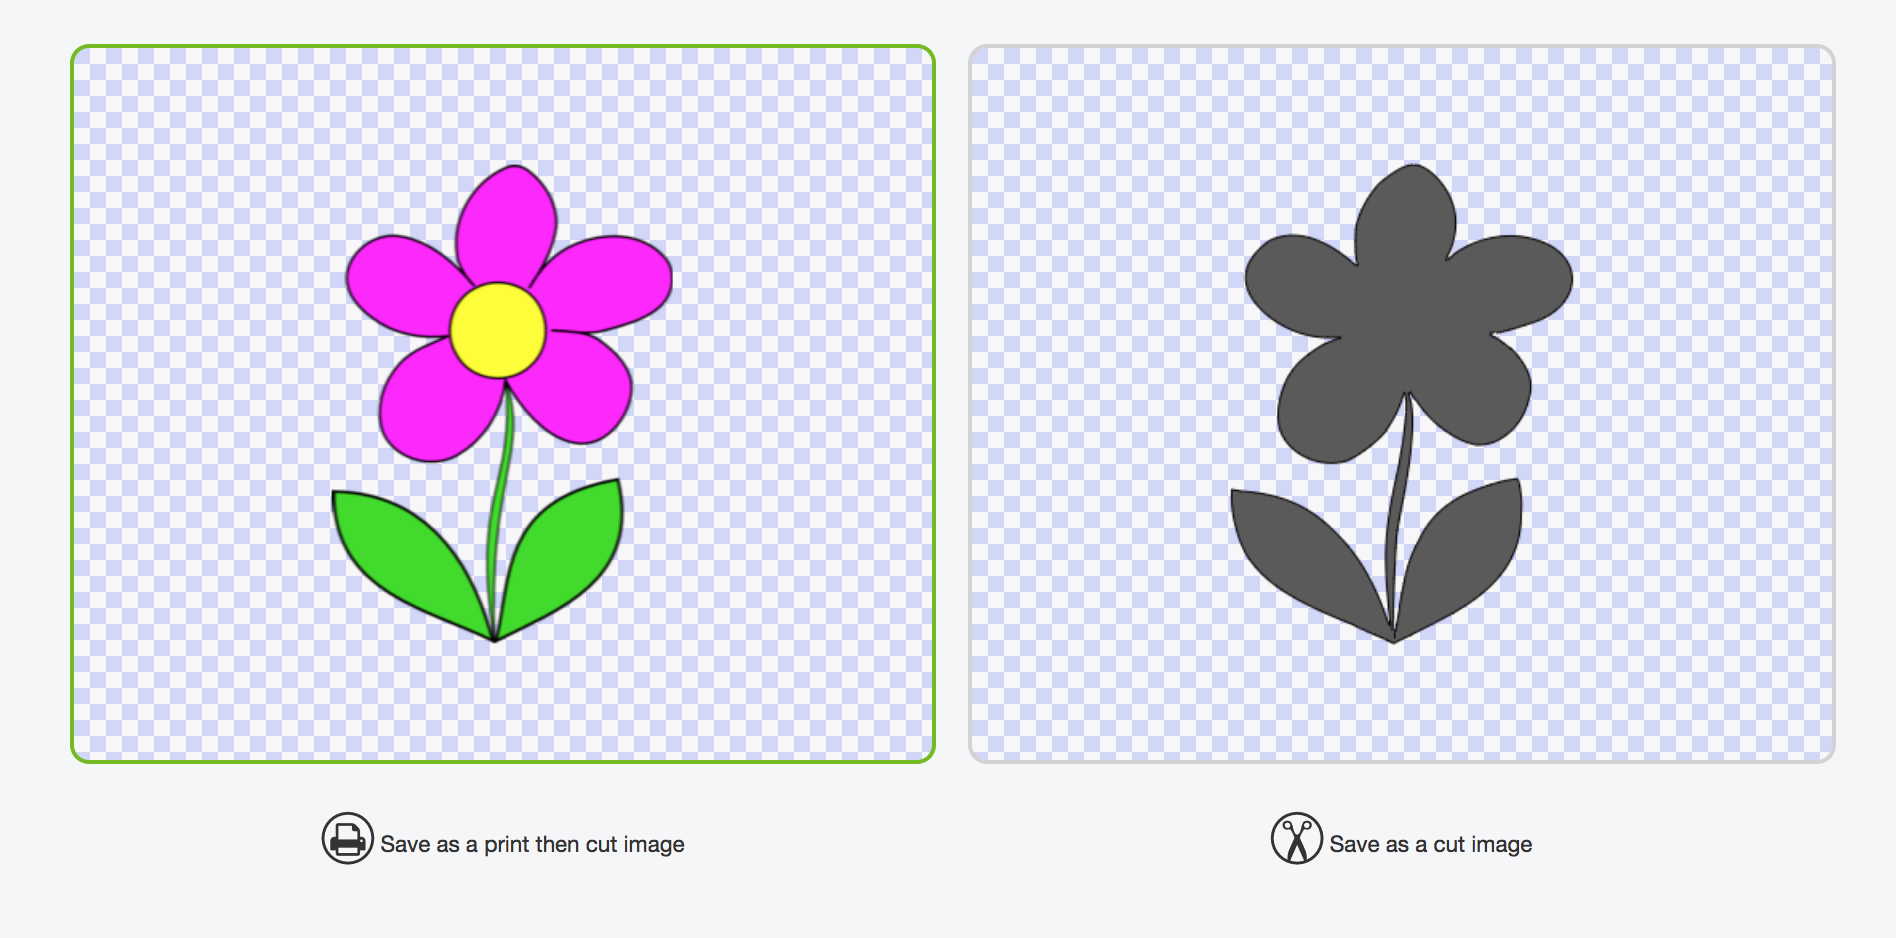
The final screen has yous select whether this is a print-then-cut paradigm or a regular cut image. In this case, it's merely a Cutting Image—no printing involved in this project. (here's an example of a impress-then-cut project).

Click Save and then click the paradigm to insert it onto your Sail.


You'll notice that the file looks good, simply information technology's a footling less crisp than the vector version (particularly at the top of the tent). Here'southward the cleaner SVG version:

This is why I ever propose finding the vector version if possible (and you don't have to practice the Select and Erase portion of the process!).
Troubleshooting JPG and PNG Uploads
Here are a few things y'all might run across when trying to upload pixel-based files.
Single Layer: Pixel-based files upload as a single layer, pregnant whatever y'all're cutting will be merely one color. My prototype above was only blackness, so it was easy. If you upload, for instance, a blossom with pink petals, a xanthous center, and green leaves…you lot're just going to get information technology all in ane outlined flower shape.
This is probably the biggest thing yous demand to remember about uploading pixel files. I color in one layer is all you're going to get. And so if you're trying to cutting, for example, a two-color company logo or a multi-color clip art image, information technology'south just non going to work.
Contrast: The blossom example above had a lot of contrast between the flower and the background. The more than dissimilarity you take in your image, the better. I oft become emails from readers who want to cutting, for example, a photo of their dog.
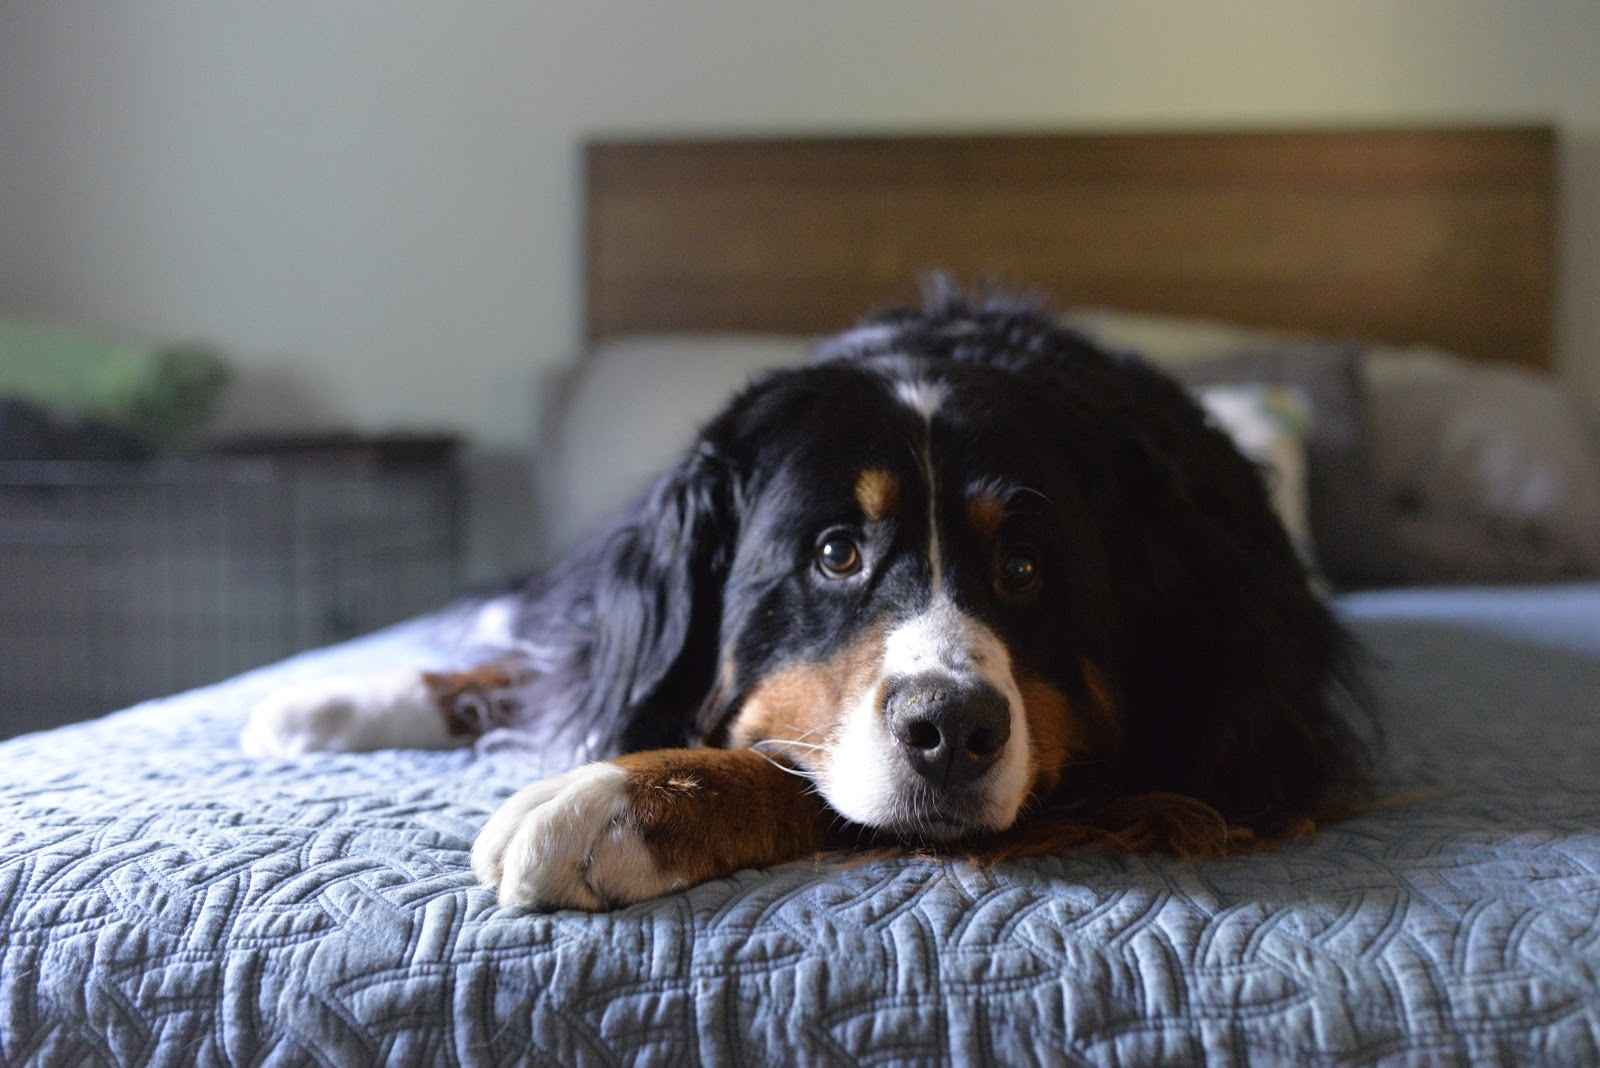
This is my dog, Gunnar. He is a large fatty love. And he'due south incommunicable to cutting out from this photo. Cricut Design Space doesn't know what is dog and what isn't. And does it cut out his blackness parts? Chocolate-brown parts? White parts? There is admittedly no contrast in this photo for Cricut Pattern Infinite to read.
Here's what happens when I try and cut this file. Following the instructions above, I uploaded this photo into Cricut Blueprint Infinite.
If I choose Simple Image, Cricut Design Infinite tries to narrow downward the number of colors in my design.

And then when I try to select and erase the "not dog" parts of this paradigm, I run into problem. The black on the headboard is the same every bit his confront and half of his face ends up getting deleted. Not going to work!
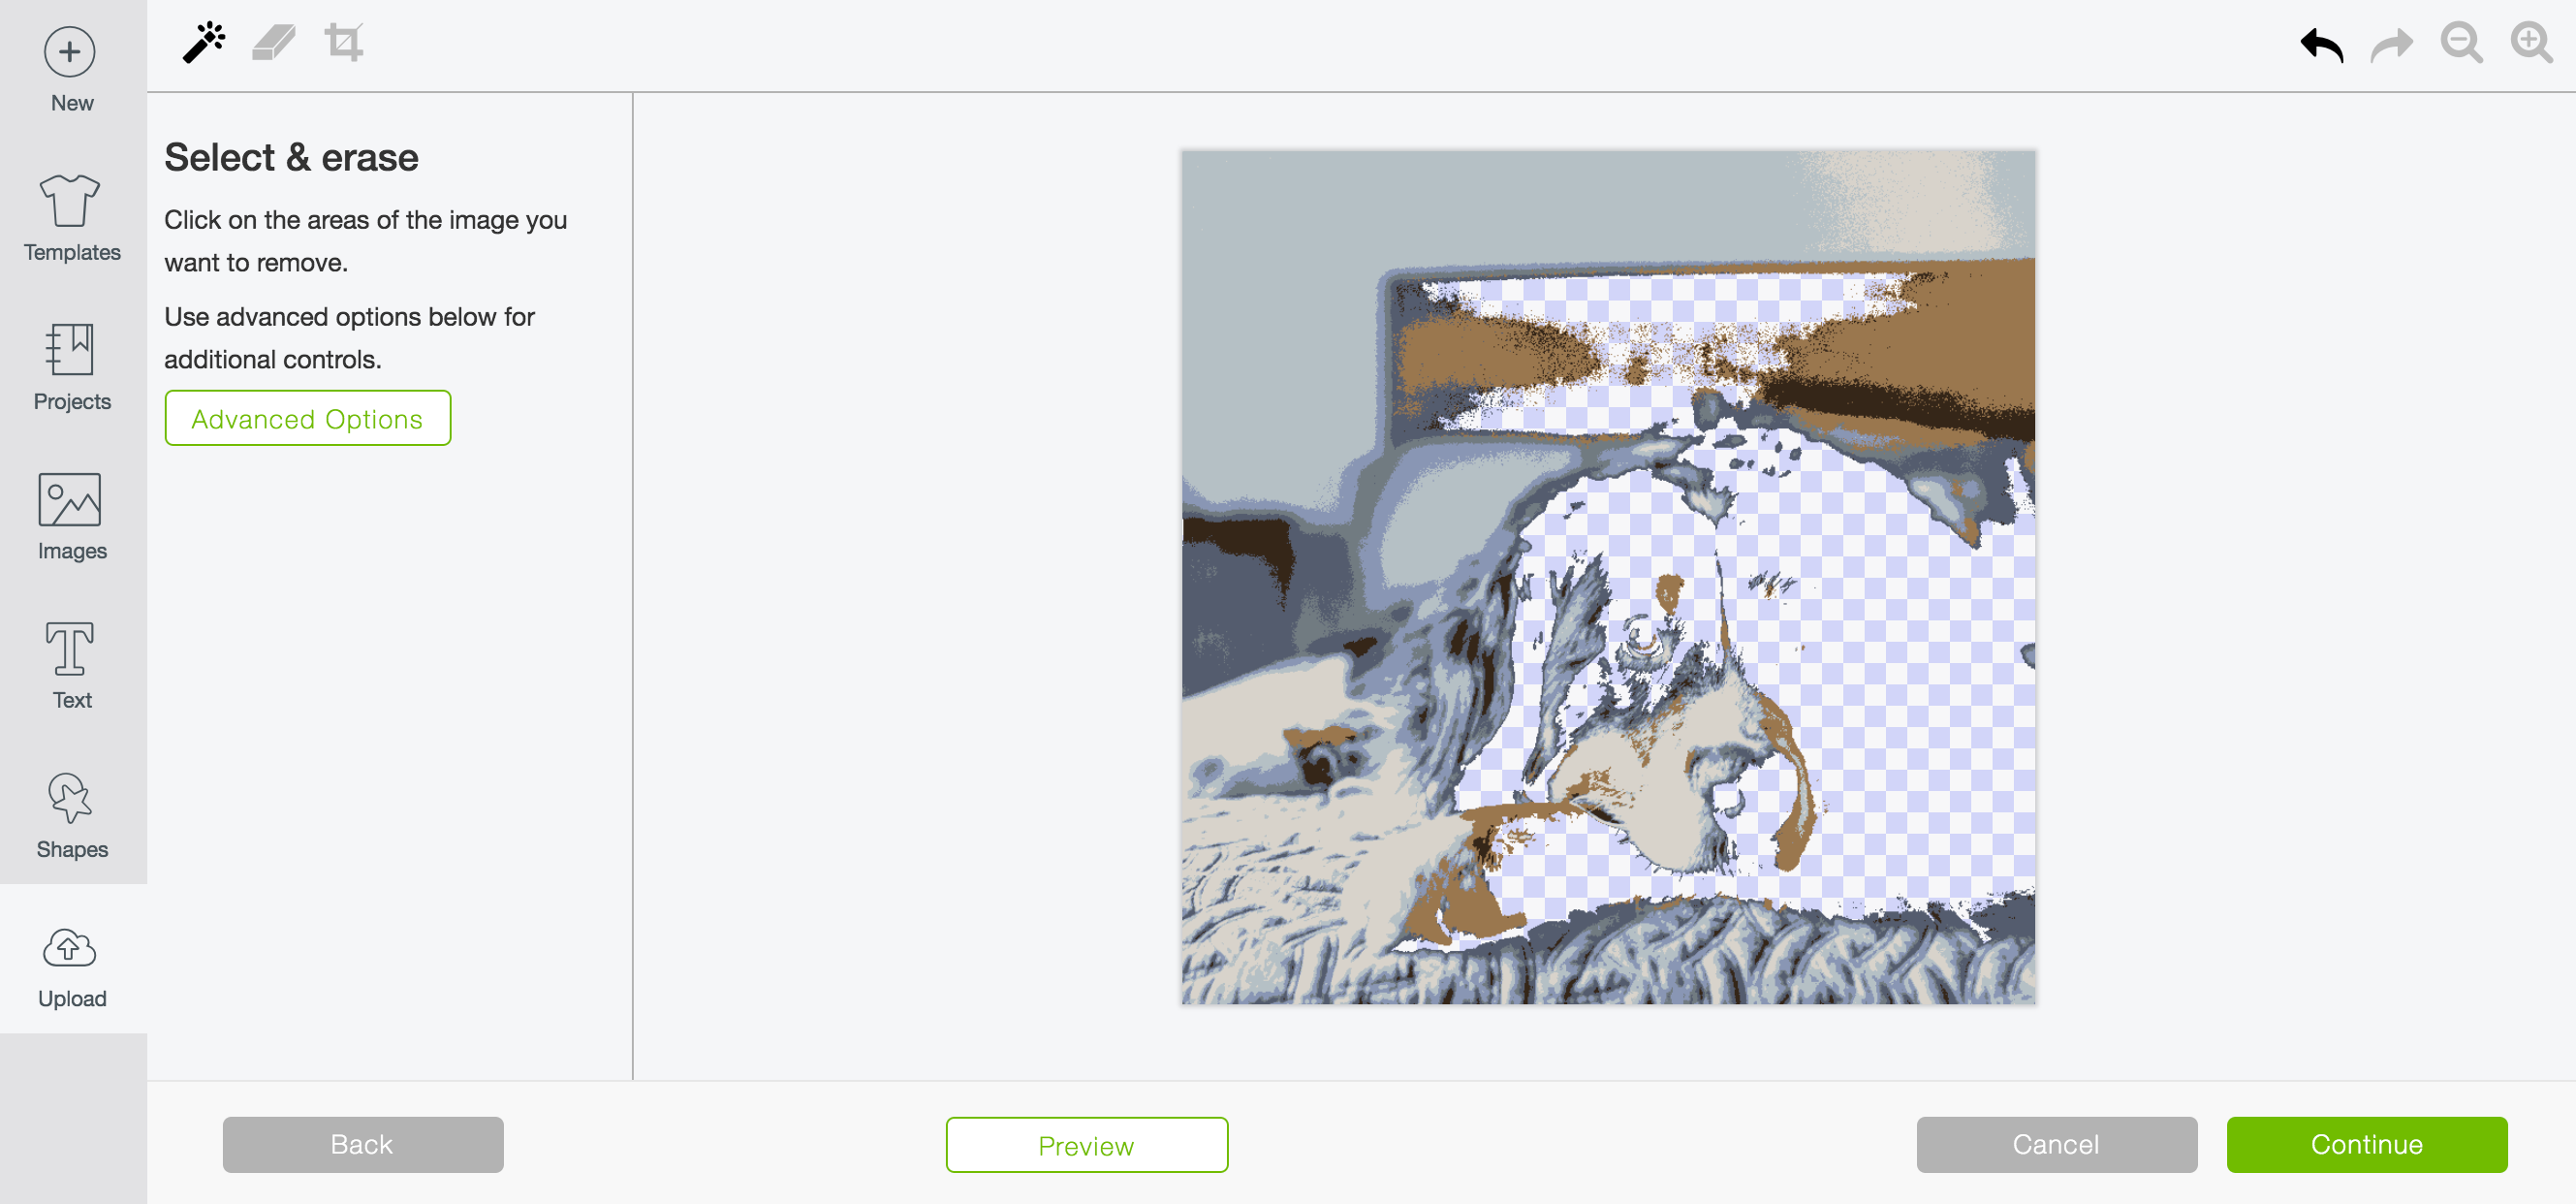
Let'due south try Complex Image instead. Once you lot start selecting and erasing yous'll run across that it'due south hard to delete all of the different parts of not-domestic dog in this photo since all the pixels are slightly different colors so it'southward not really deleting them in chunks very well.

Let's try using the eraser instead. I tin delete everything effectually my dog more easily this manner.
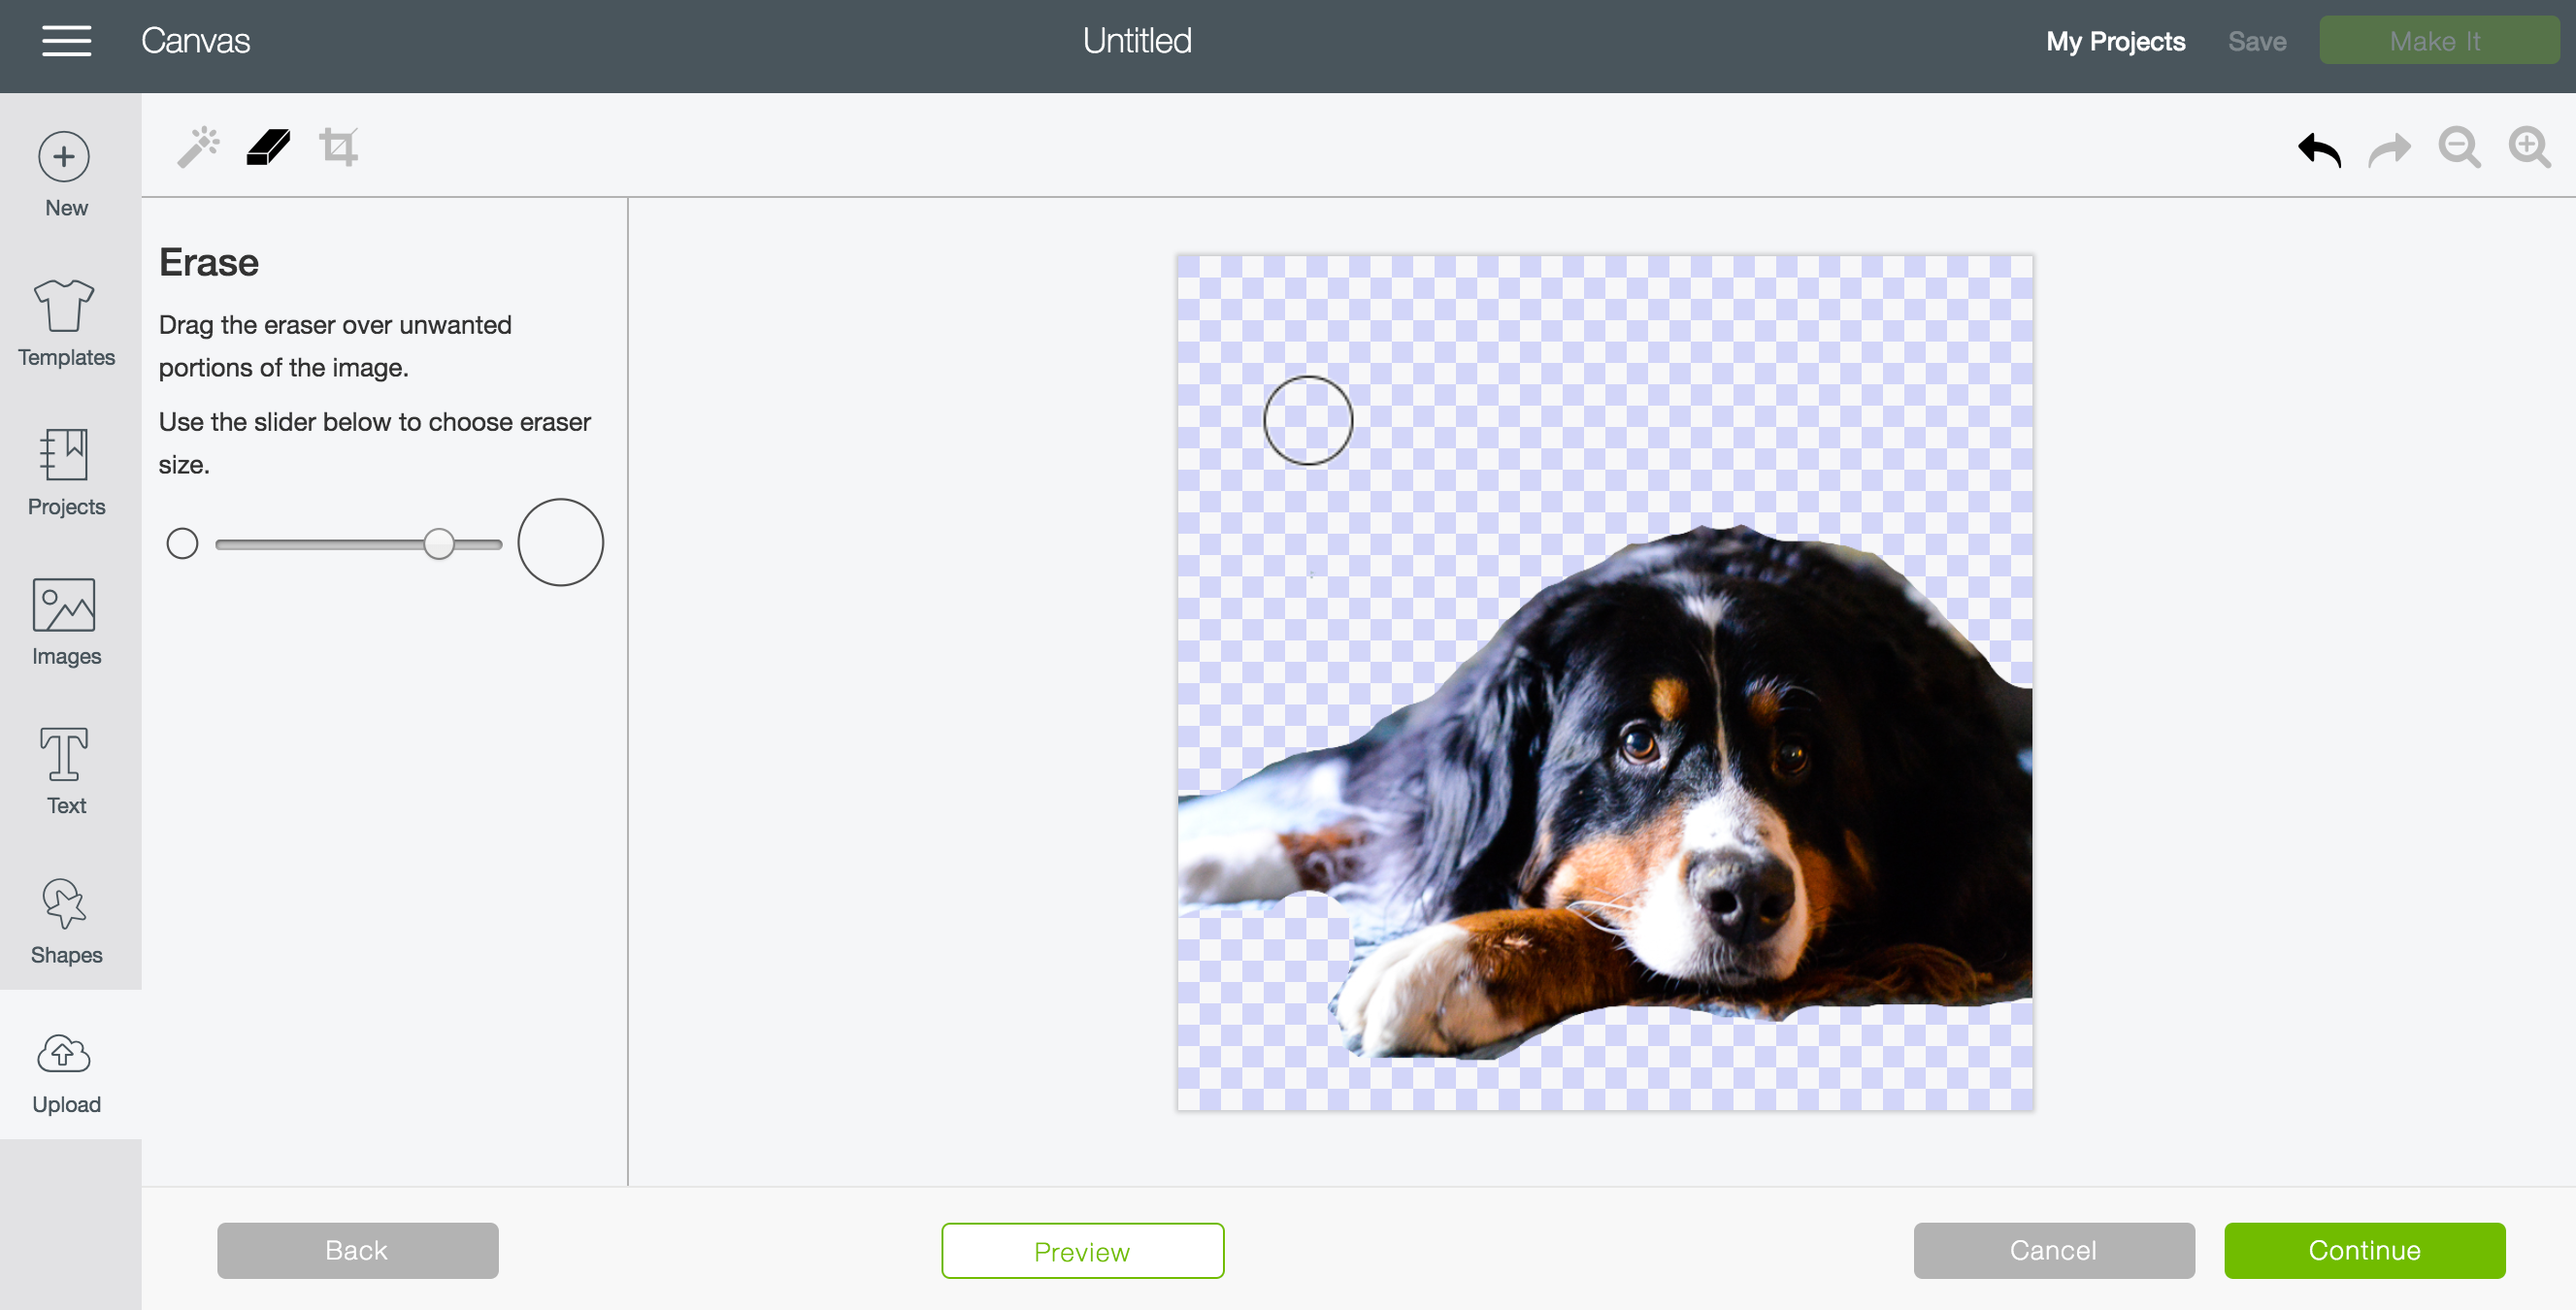
Okay, absurd. At present we have a domestic dog. Let's click Continue.
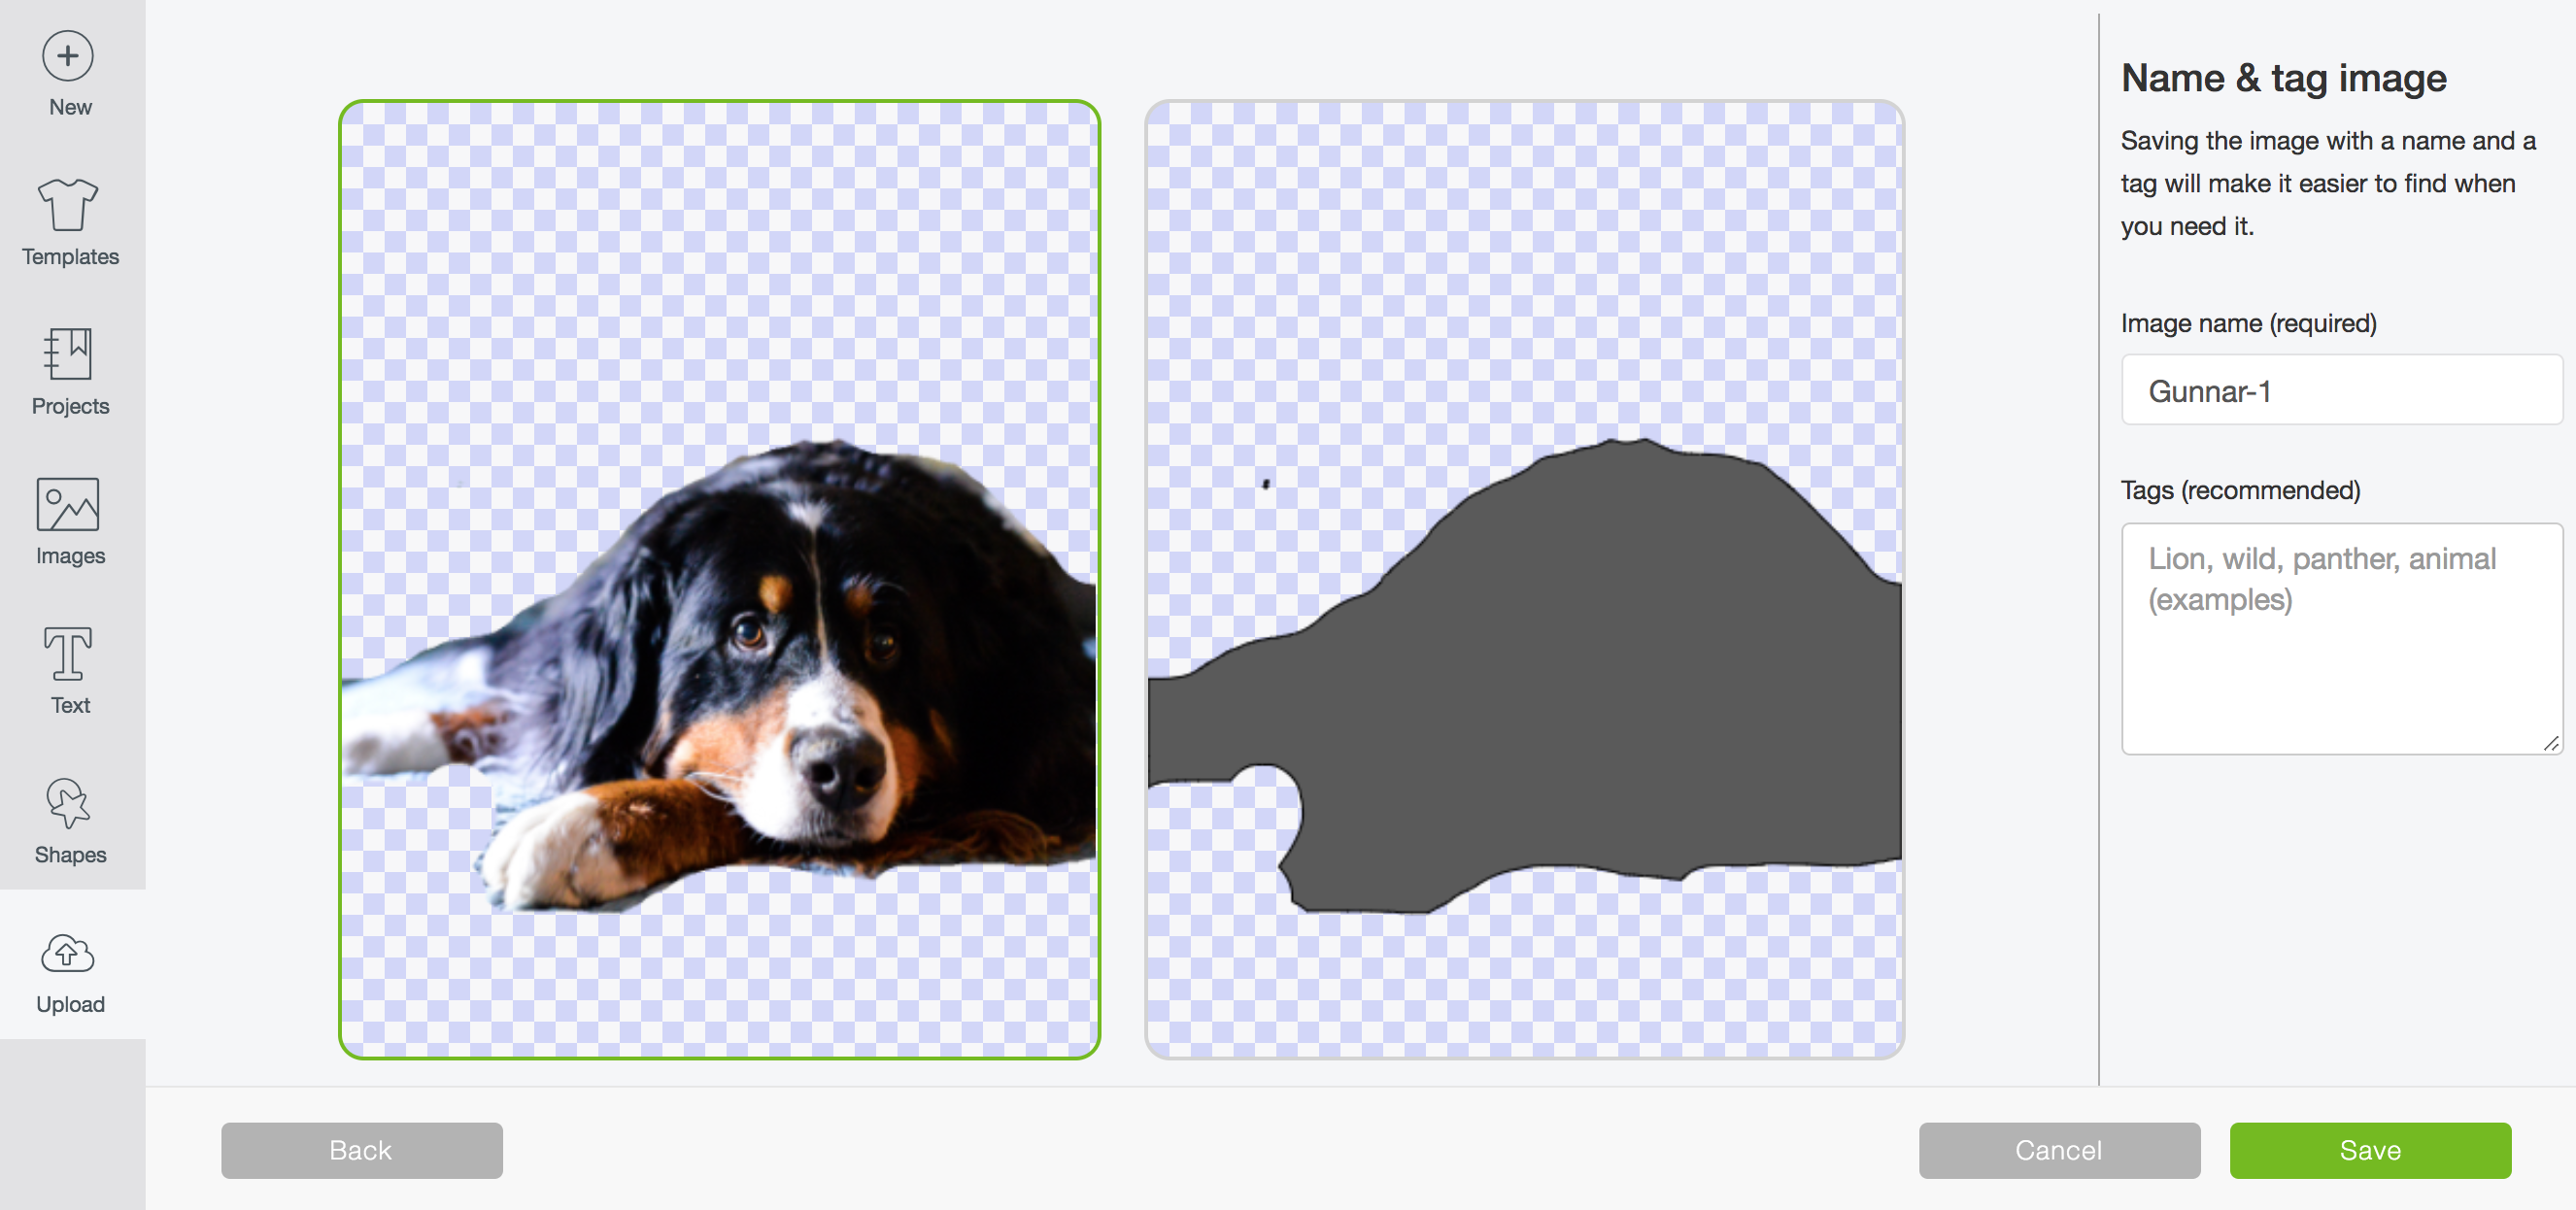
And…nope. That'due south just basically a dog lump because again, it turns all pixel files into a single layer. Then you can see how it is pretty much incommunicable to cut those low-contrast photos! You'll accept more luck with two color (black and white, generally) images than you always volition with a photo like this.
Print Then Cut
Actually, if yous want to cut out photos, you want to use Cricut's Print Then Cut feature. You can print the image on your abode computer, and so utilize your Cricut to cut around the outside of the paradigm! I'thousand working on a detailed Print then Cutting lesson—stay tuned!

More Cricut Pattern Space Tutorials
[ess_grid allonym="cricut_design_space"]
Source: https://heyletsmakestuff.com/cricut-upload-images/
0 Response to "How to Use an Uploaded Image on Cricut"
Enviar um comentário